Hacking my Sprinkler System
All lines of code written in this project came from me... and maybe some small pieces from stackoverflow.
Introduction
Due to the sprinkler controller being the original one installed in the house it is a bit out of date. The biggest problem is that all sprinkler programs are deleted if there is a power outage of more than a few minutes. Which means I have to completely reprogram the controller every time there is a heavy storm or the power company messes up.
The Goals
I want to hack into the sprinkler system with the raspberry pi so that I don't have to reprogram it all the time. I can then create any UI I want on any platform to trigger different sprinkler zones.
Research
I have been programming for a very long time and I've picked up a thing here and there from my Theoretical Electricity Physics classes. But I have no idea how a sprinkler system works. So the first thing to do was to study the system in place.
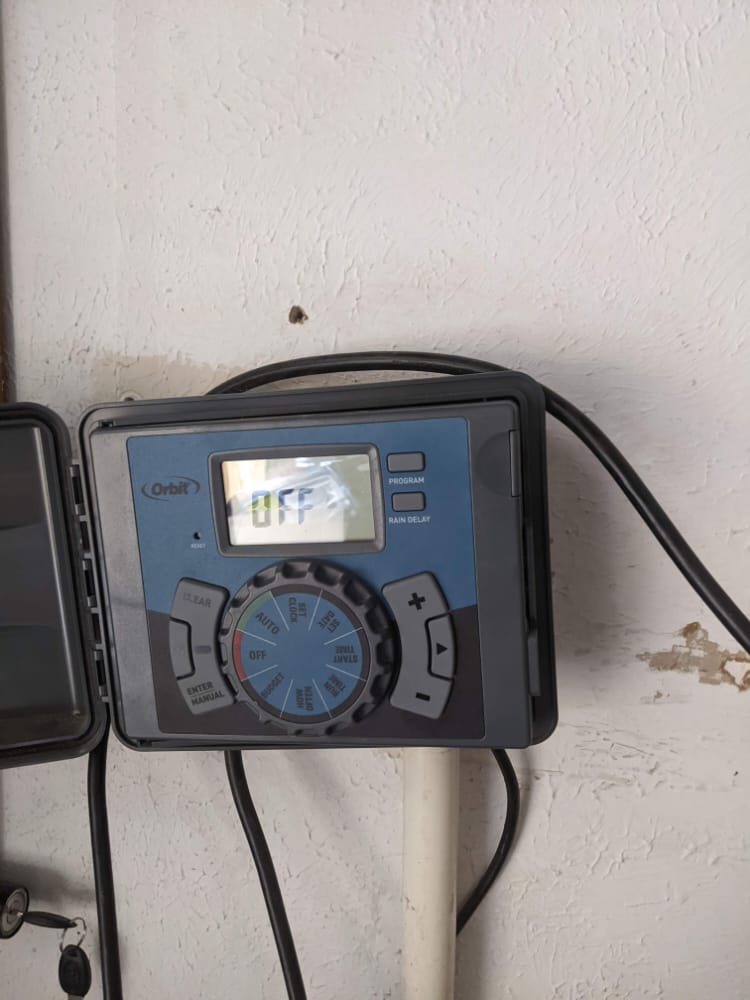
So first, I said hello to the sprinkler controller.
Next, I opened it up to expose the electronics
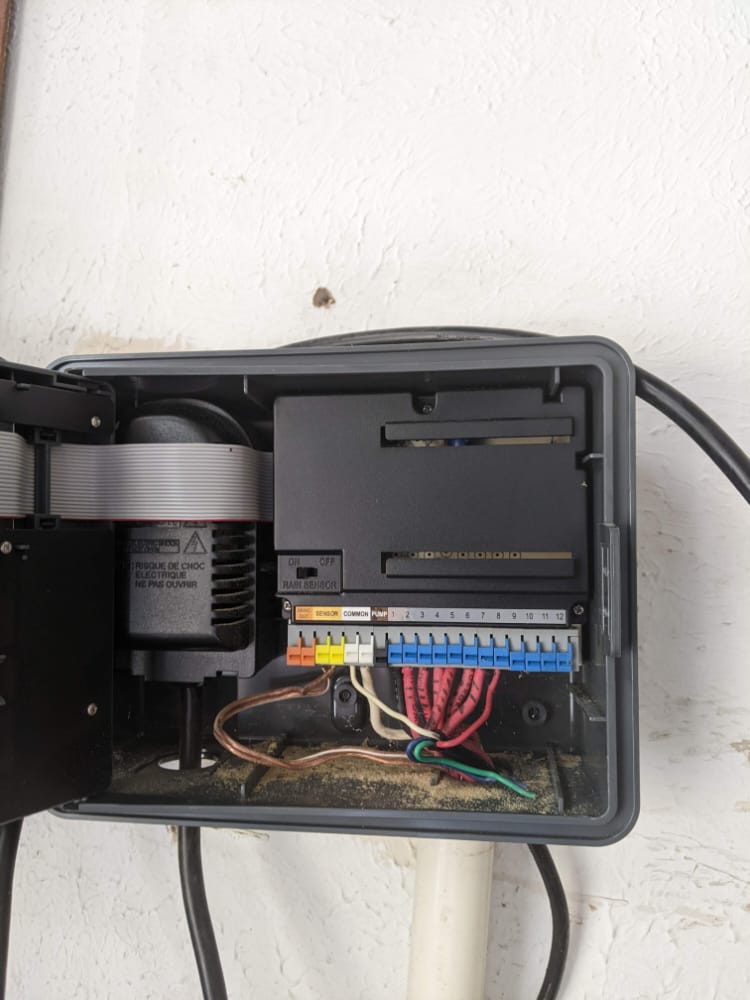
I was greeted by a bunch of dust, and what looked to be wires that might control each sprinkler zone. This was very very good because that meant I should be able to get rid the original system completely and just send signals to those wires.
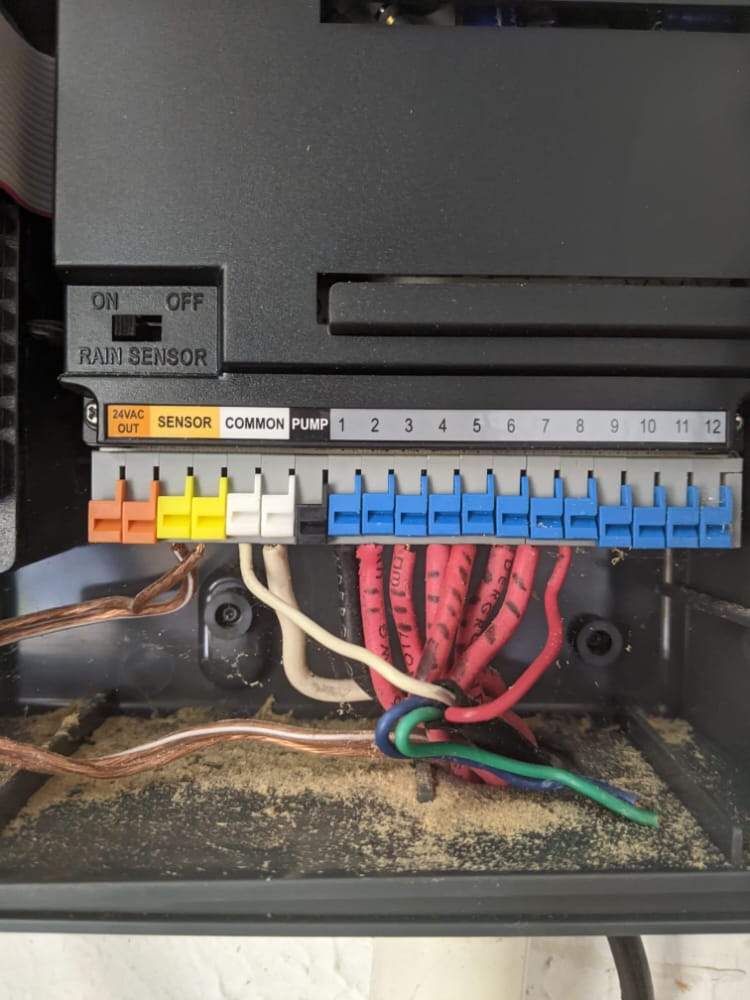
Upon closer inspection, indeed each wire is labeled with a zone, we have 8 zones and the controller supports 12. Also, we apparently have a rain sensor, could be useful later on.
Now I know that each wire controls each zone. I need to figure out what signal needs to be sent to each wire to activate that zone.
Off to google! I searched up "sprinkler controller wires" and went to videos.
Now I know for sure the wires are directly connected to sprinkler valve solenoids, which control water flow to each zone.
However, it seems that these solenoids are powered by the controller, which means I'll need to come up with my own power supply if I intend to use them with the raspberry pi. So off to google again to research what power they take.
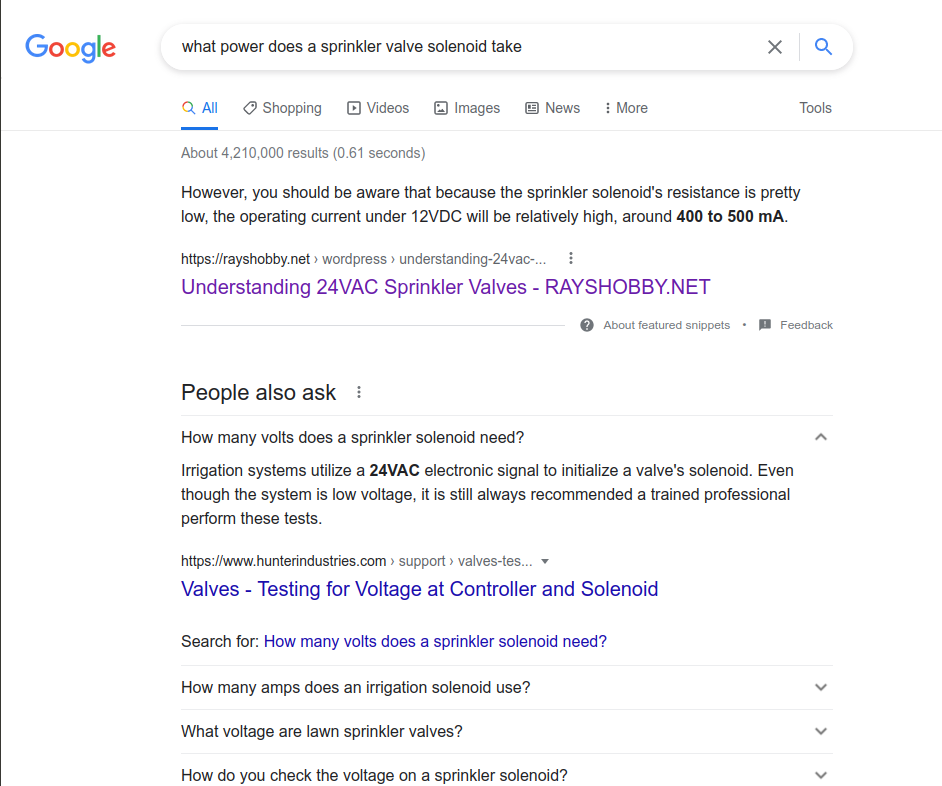
24VAC seems to be the power source required, but I also verified it by using my multimeter on the wires to test them. Around 26VAC was what I read. So, a 24VAC power supply should do just fine.
Now I'll also need new wires to connect everything, a relay board for the raspberry pi, and a way to connect wires.
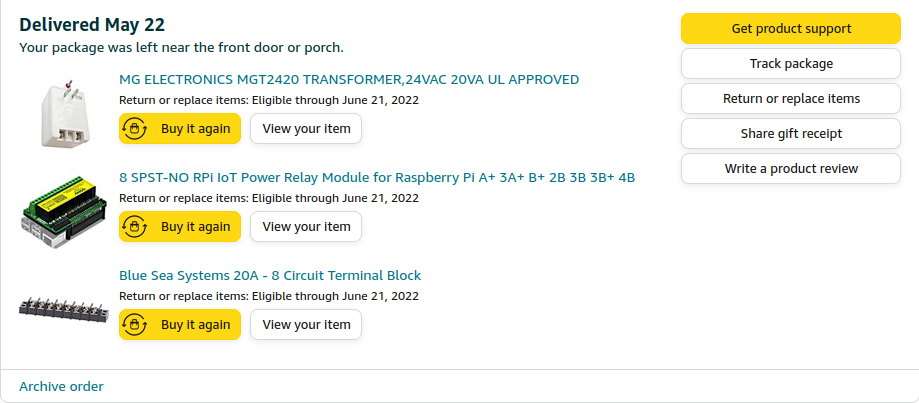
I googled how to connect a bunch of different wires to a ground output and I found the terminal block was a good way to create a "daisy chain" that will connect everything.
I also bought a spool of wire from home depot along with some push connectors.
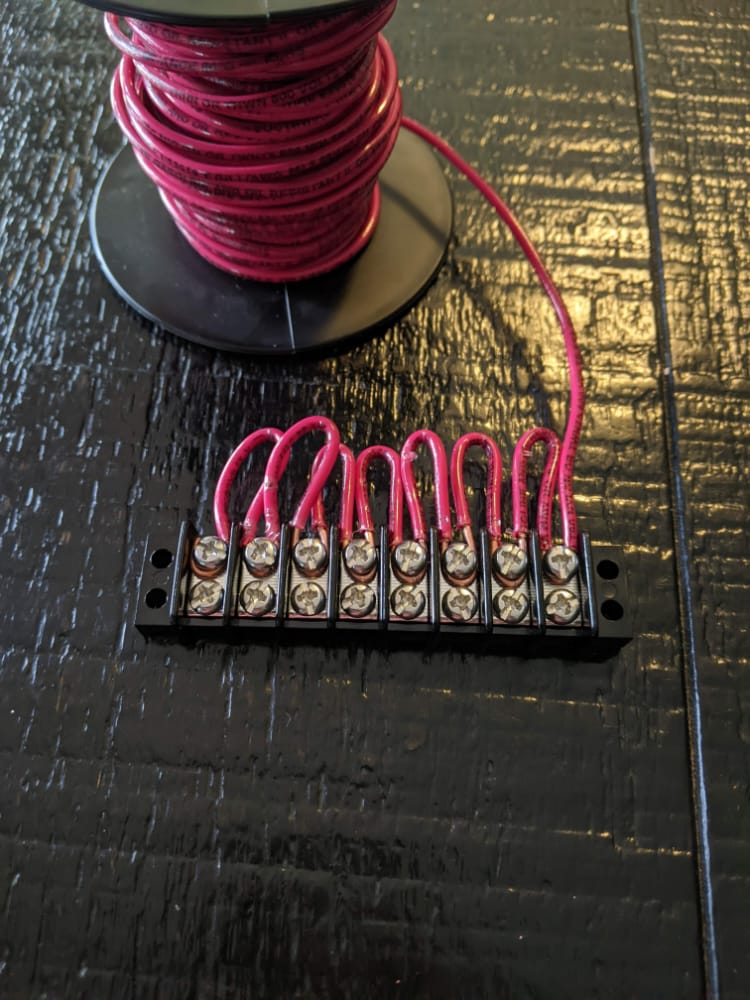
Daisy Chaining
Now that I have all the materials, I just need to wire, starting with a basic daisy chain.
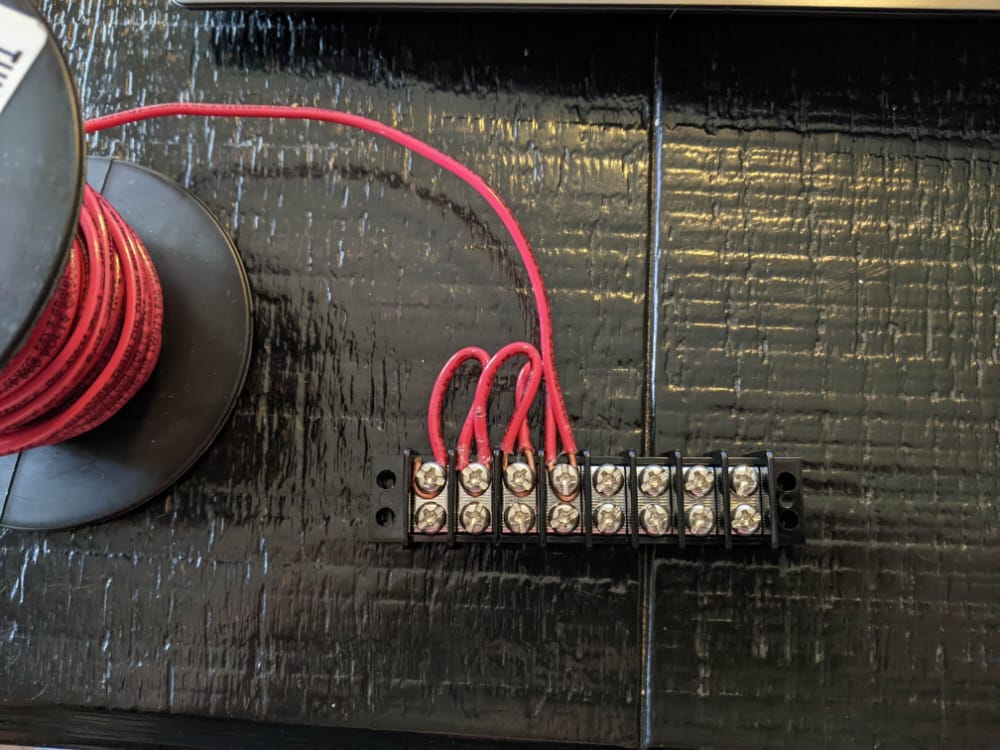
The wire I bought was pretty stiff, so I had to get pliers to bend it around each of these terminals. Stripping it was also quite a challenge because of a plastic insulation around the rubber insulation but I had a friend there helping me.
Making a case
Next I tried to put the raspberry pi along with the relay board inside the old sprinkler controller case.
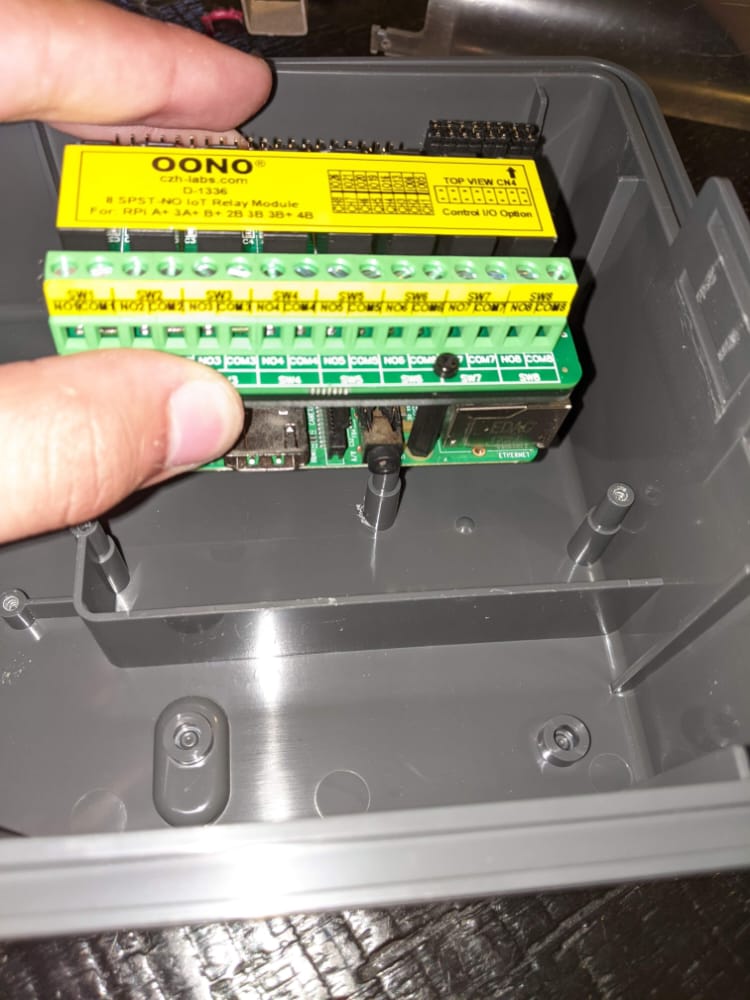
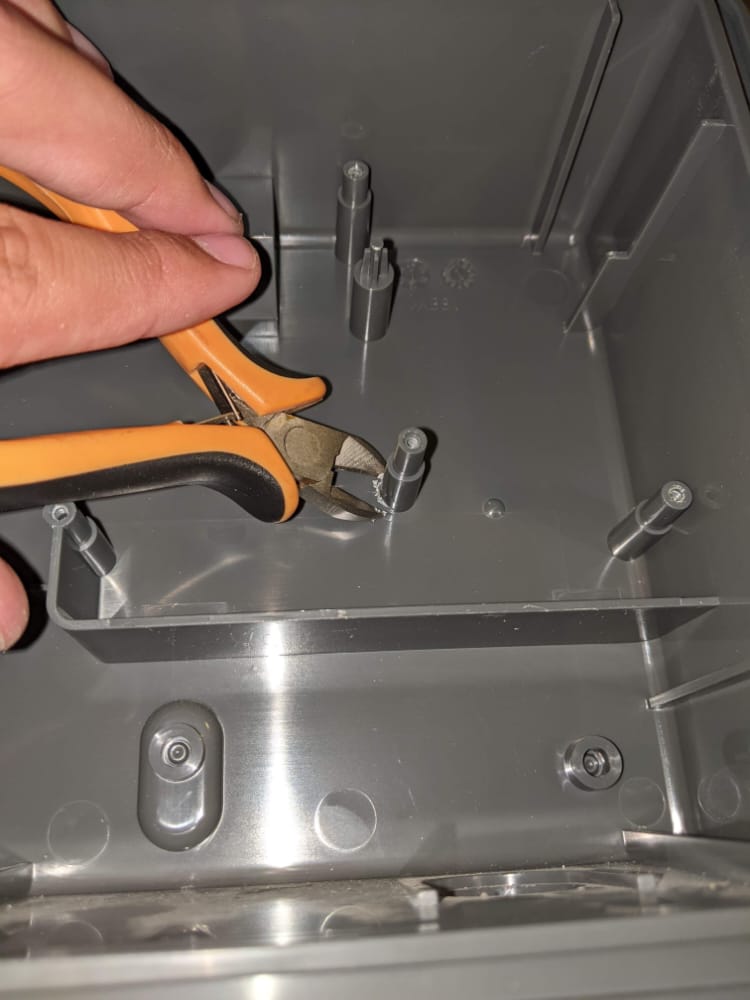
Due to a screw mount it didn't fit, so I just cut out the screw mount.
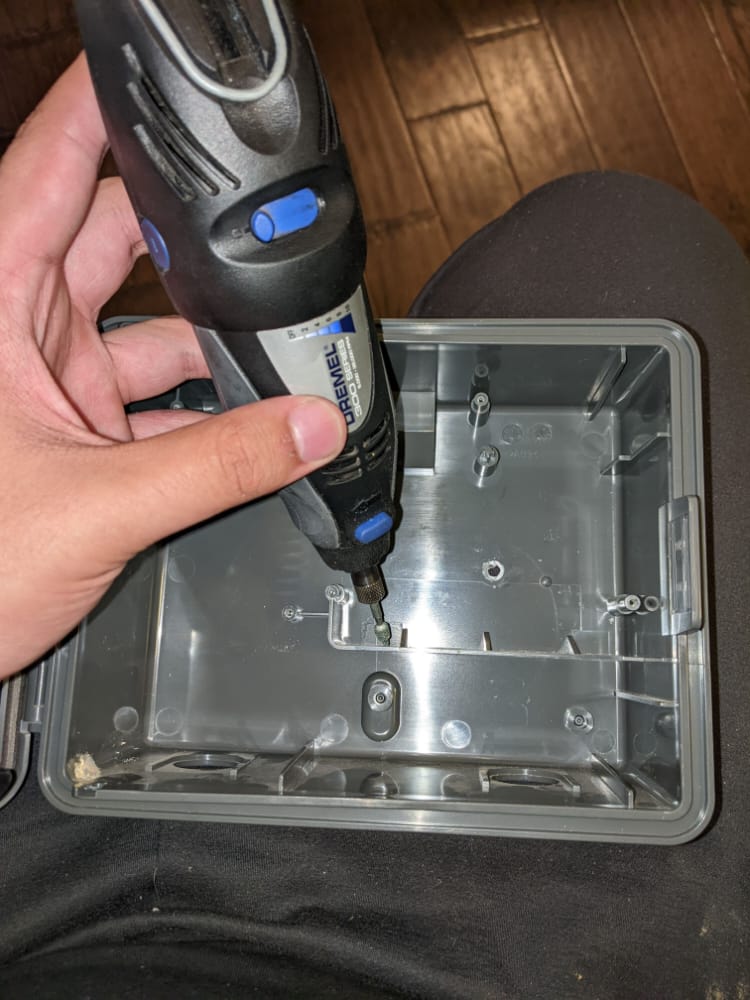
I then needed to dremmel a hole for the power chord as it didn't fit.
Assembling
Now I can start working on assembling the final product. I started to connect the wires to each of the common terminals on each relay.
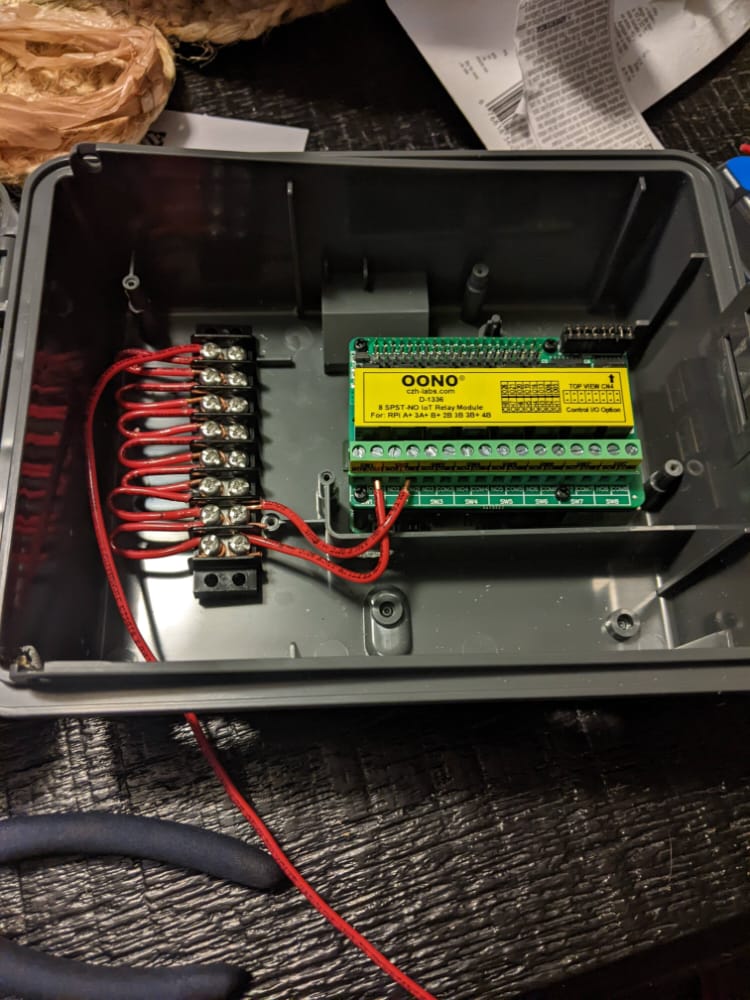
Then I put the box on the wall and connected each sprinkler wire to each of the Normally Open terminals on the raspberry pi relay shield. I used some push connectors to extend some wires because the sprinkler wires weren't long enough.
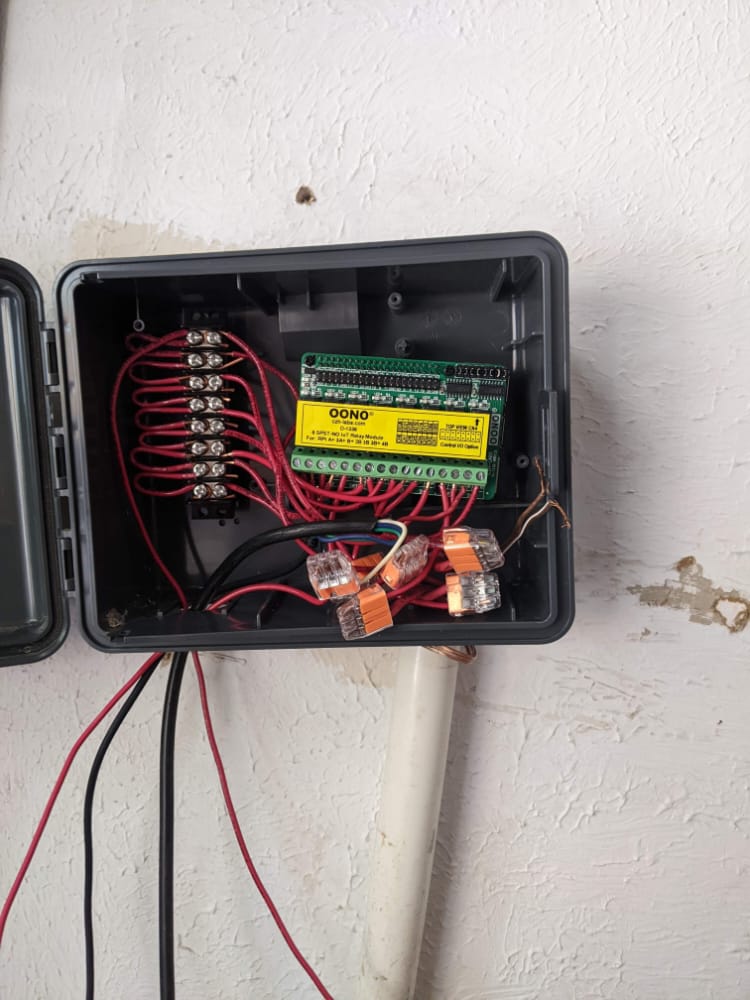
Ta-da! I said my experience with electronics was mostly theoretical. This may be ugly but everything is connected!
Programming
The raspberry pi is setup with Ubuntu Server and I'll be using node.js to create a webserver that just accepts post requests.
I found a nodejs library super quickly that made working with GPIO pins super easy. So I then wrote the following function to simply run a zone.
var zones = [new Gpio(5,'out'),new Gpio(6,'out'),new Gpio(13,'out'),new Gpio(16,'out'),new Gpio(19,'out'),new Gpio(20,'out'),new Gpio(21,'out'),new Gpio(26,'out')];
for(let ind = 0;ind<8;ind++){
	zones[ind].writeSync(0);
}
async function runZone(index,seconds){
	for(let ind=0;ind<8;ind++){
		if(zones[ind].readSync()==1) return;
	}
	console.log("Turning on Sprinkler: ",index);
	zones[index].writeSync(1);
	console.log(`Waiting ${seconds} seconds...`);
	await sleep(seconds*1000);
	console.log("Turning off Sprinkler: ",index);
	zones[index].writeSync(0);
}
function sleep(ms) {
  return new Promise((resolve) => {
    setTimeout(resolve, ms);
  });
}
That handles the hardware logic for running a sprinkler zone for a given time.
Now I just needed a webserver that listens for requests to turn on the sprinklers. Simple enough.
const server = http.createServer((req, res) => {
  console.log("Request was made: " + req.url);
  console.log("HEADERS: " + req.headers);
  const urlPath = req.url;
  if(urlPath === "/setsprinkler"){
    if(req.method === "POST"){
    req.on("data", (data) => {
      let parsedData = parseData(data.toString());
      console.log(parsedData);
      let zone = parseInt(parsedData["zone"]);
      let value = parseInt(parsedData["value"]);
      console.log(`Zone: ${zone} value: ${value}`);
      if(value==1){
	let seconds = parseInt(parsedData["seconds"]);
	runZone(zone-1,seconds);
      }else zones[zone-1].writeSync(0);
    });
    res.end("Query Processed.");
    }
    else{
	res.end("No.");
    }
  }
  else {
    res.writeHead(200, {"Content-Type": "text/html"});
    res.end("404. Aww :(");
  }
});
parseData is a function that I either found on stack overflow or github copilot wrote for me. It just takes the data and converts it to a json object I can use.
I then created a post link on my main webserver. That would just forward the request to the sprinkler controller pi.
if(urlPath === "/setsprinkler"){
    if(req.method === "POST"){
      req.on("data", (data) => {
        console.log("POST DATA: "+data);
        let isLoggedIn = false;
        //Check if user is already logged in
        req.rawHeaders.forEach((header, index) => {
          if(header === "csrf-token"){
            const csrf_token = req.rawHeaders[index + 1];
            if(csrf_tokens[csrf_token] != null){
              isLoggedIn = true;
            }
          }
        });
        console.log("isLoggedIn: "+isLoggedIn);
        if(isLoggedIn||true){
          //Forward request to sprinkler at sprinklerip
          const options = {
            host: sprinklerIp,
            hostname: sprinklerIp,
            port: 80,
            path: "/setsprinkler",
            method: "POST",
            headers: {
              'Content-Type': 'application/x-www-form-urlencoded',
              'Content-Length': data.length
            },
          };
          let sprinklerRequest = http.request(options, (res) => {
            console.log(`STATUS: ${res.statusCode}`);
            console.log(`HEADERS: ${JSON.stringify(res.headers)}`);
            res.setEncoding('utf8');
            res.on('data', (chunk) => {
                console.log(`BODY: ${chunk}`);
            }
            );
          });
          sprinklerRequest.write(data);
        }
      });
    }
}
You can see I have an account system but it's being bypassed because the system is not yet done.
Final step was to create a webpage with a form to submit post requests.
<html>
	<head>
		<link rel="stylesheet" href="index.css">
	</head>
	<body>
        <!---Create a form that takes a 'Sprinkler Zone' number from 1 to 8 and an 'value' that is 0 or 1 and submits them to '/setsprinkler'-->
        <form action="/setsprinkler" method="POST">
            <label for="zone">Zone:</label>
            <input type="number" name="zone" min="1" max="8" required>
            <label for="seconds">Seconds:</label>
            <input type="number" name="seconds" min="0" max="999" required>
            <label for="value">Value:</label>
            <input type="number" name="value" min="0" max="1" required>
            <input type="submit" value="Submit">
        </form>
		<div id="footer" style="height: 200rem"></div>
	</body>
</html>
I do have google copilot and use it whenever there is a simple task, I did not have to edit the final code much.
A Demonstration
Finally, here is the first time I tested out the sprinkler system. I have since added the time option.
The Conclusion
This was a very fun project as I got way out of my comfort zone by diving into electronics. This sprinkler system is not done yet as the UI is quite horrible. So in the future I will most likely post an update on a new, user-friendly UI made with react.